Welcome to our comprehensive guide on RV awning repair. If you are an avid traveler or outdoor enthusiast, you understand how important a functional awning is for providing shade and protection during your adventures. However, tears and rips can occur, compromising the awning’s effectiveness and longevity. In this article, we will explore quick and easy ways to repair tears in your RV awning, saving you time and money in the process. Whether you are a DIY enthusiast or a novice, this guide will provide you with valuable tips and techniques to preserve and maintain your RV awning.
Key Takeaways:
- Quick fixes for RV awning tears are possible with the right tools and materials.
- Regular maintenance can help prevent awning tears and extend its lifespan.
- Assessing the long-term condition of your awning can help determine when repairs are no longer sufficient.
- Consider seeking professional help for extensive damages or when unsure of your repair abilities.
- Budgeting for awning repairs and comparing prices for repair materials can help you find affordable solutions.
Know What Causes Camper Awning Tears
When enjoying outdoor adventures in your camper, a tear in your awning can be both frustrating and inconvenient. Understanding the causes of camper awning tears can help you prevent them and ensure a longer lifespan for your awning.
Poor craftsmanship: In some cases, camper awning tears can be attributed to substandard manufacturing or installation. Faulty stitching, weak seams, or low-quality materials may contribute to the vulnerability of your awning.
Loose threads: Over time, loose threads can develop on your awning due to regular usage and exposure to the elements. These threads can catch on nearby objects or become entangled, leading to tears.
Wear and tear: Continuous usage, folding, and unfolding of the awning can cause wear and tear over time. This can weaken the fabric and make it more susceptible to tears and damage.
Debris: Leaves, twigs, branches, and other debris can accumulate on your awning, especially during outdoor excursions. When not promptly removed, this debris can degrade the awning material and even puncture it, resulting in tears.
Extreme weather conditions: Harsh weather elements like strong winds, heavy rain, hail, or intense sun exposure can put stress on your awning, potentially leading to tears. It’s important to take precautions such as retracting the awning or using additional supports during severe weather conditions.
By being aware of these common factors, you can take proactive measures to minimize the risk of camper awning tears and ensure a longer lifespan for your awning.
Prevention Tips to Reduce Awning Tears
To prevent awning tears, consider the following tips:
- Inspect your awning regularly for loose threads, small tears, or signs of wear and tear.
- Clean your awning regularly, removing any debris or dirt that could cause damage.
- Retract the awning during heavy rain, strong winds, or other severe weather conditions.
- Use additional supports or tie-downs to increase stability during inclement weather.
- Invest in high-quality awnings and ensure professional installation for optimal craftsmanship.
By implementing these preventive measures, you can significantly reduce the likelihood of camper awning tears and enjoy your outdoor adventures worry-free.
The Types of Damage
Awning damage can vary in severity, ranging from small holes and tears to larger, more significant damage. It is crucial to understand the different types of awning damage to effectively address and repair them.
Small Holes in Awnings
Small holes in awnings may be barely noticeable at first, but they can lead to more significant issues if left untreated. These tiny openings can allow water, dirt, and debris to enter the awning fabric, causing further damage over time. It is essential to address these small holes promptly to prevent further deterioration.
Small Tears in Awnings
Similarly, small tears in awnings can start innocuously but have the potential to worsen over time. These tears may be caused by sharp objects, tree branches, or general wear and tear. Although they may initially seem insignificant, small tears can grow larger with exposure to wind and rain. It is important to repair these tears as soon as possible to avoid further damage and maintain the integrity of the awning.
Large Holes in Awnings
Large holes in awnings can occur due to accidents, severe weather conditions, or prolonged neglect of smaller damage. These holes are more noticeable and, if left unaddressed, can render the awning unusable. Repairing large holes may require comprehensive patching and replacement of damaged sections. It is essential to assess the extent of the hole and seek appropriate repair methods or professional assistance.
Large Tears in Awnings
Large tears in awnings are similarly severe and may result from accidents, strong winds, or the accumulation of untreated small tears. These tears can significantly impact the functionality and appearance of the awning, jeopardizing its effectiveness in providing shade and protection. Repairing large tears may involve more extensive measures such as patching or even replacing sections of the awning fabric. It is crucial to evaluate the tear’s size and seek appropriate repair solutions.
Understanding the different types of awning damage, from small holes to large tears, allows for a more accurate assessment and effective repair plan. Whether it’s addressing small issues before they worsen or taking the necessary steps to repair large damage, promptly addressing awning damage can help maintain the longevity and functionality of your awning.
Repair Steps
Repairing RV awning tears can be a manageable do-it-yourself project with the right tools and materials. By following a series of simple steps, you can fix tears in your RV awning and ensure its continued functionality. Here’s a breakdown of the repair process:
Step 1: Assess the Damage
Carefully examine the awning to determine the size and extent of the tear. This will help you determine the appropriate repair method and materials needed.
Step 2: Remove the Awning
Safely remove the awning from your RV, ensuring that you have enough space to work comfortably. This step will make it easier to access the damaged area and perform the necessary repairs.
Step 3: Fixing Small Holes and Tears
For small holes and tears, you can use a high-quality repair tape specifically designed for awnings. Cut a piece of tape slightly larger than the damaged area and carefully apply it to cover the tear. Smooth out any air bubbles and ensure a secure bond.
Step 4: Addressing Larger Holes and Tears
If the tear is larger and repair tape is not sufficient, you may need to use patching materials. Cut a patch slightly larger than the damaged area and apply an adhesive designed for outdoor use. Place the patch over the tear, press firmly, and allow it to fully adhere before moving on to the next step.
Step 5: Clean, Dry, and Secure
Thoroughly clean the repaired area and the entire awning, if necessary. Use a mild detergent, a soft brush, and water to remove any dirt or grime. Rinse off the soap and allow the awning to dry completely before reattaching it to your RV. Ensure that the awning is properly secured and aligned with the mounting hardware to prevent future tears.
By following these steps, you can effectively repair tears in your RV awning and get back to enjoying the shade and protection it provides during your outdoor adventures.
Awning Maintenance Tips
Regular maintenance is crucial for preventing awning tears and prolonging the lifespan of your RV awning. By following these simple tips, you can ensure that your awning remains in excellent condition:
- Keep it clean: Regularly clean your awning to remove dirt, debris, and stains. Use a mild detergent, warm water, and a soft brush or cloth to gently scrub the surface. Rinse thoroughly and allow it to air dry before retracting.
- Remove debris: Clear any leaves, twigs, or other debris that may accumulate on the awning fabric or in the awning arms. Preventing debris from settling on the awning will minimize the risk of tears or damage.
- Inspect for damage: Take the time to inspect your awning for any signs of wear, tears, or loose stitching. Pay extra attention to the seams, corners, and areas where the fabric attaches to the frame. If you spot any damage, address it promptly to prevent further issues.
- Secure during inclement weather: When strong winds or storms are forecasted, it’s important to secure your awning properly. Retract the awning and use tie-down straps or stakes to keep it firmly in place. This will help prevent the awning from flapping or being damaged during adverse weather conditions.
By following these maintenance tips, you can keep your RV awning in excellent condition and minimize the risk of tears or other types of damage.

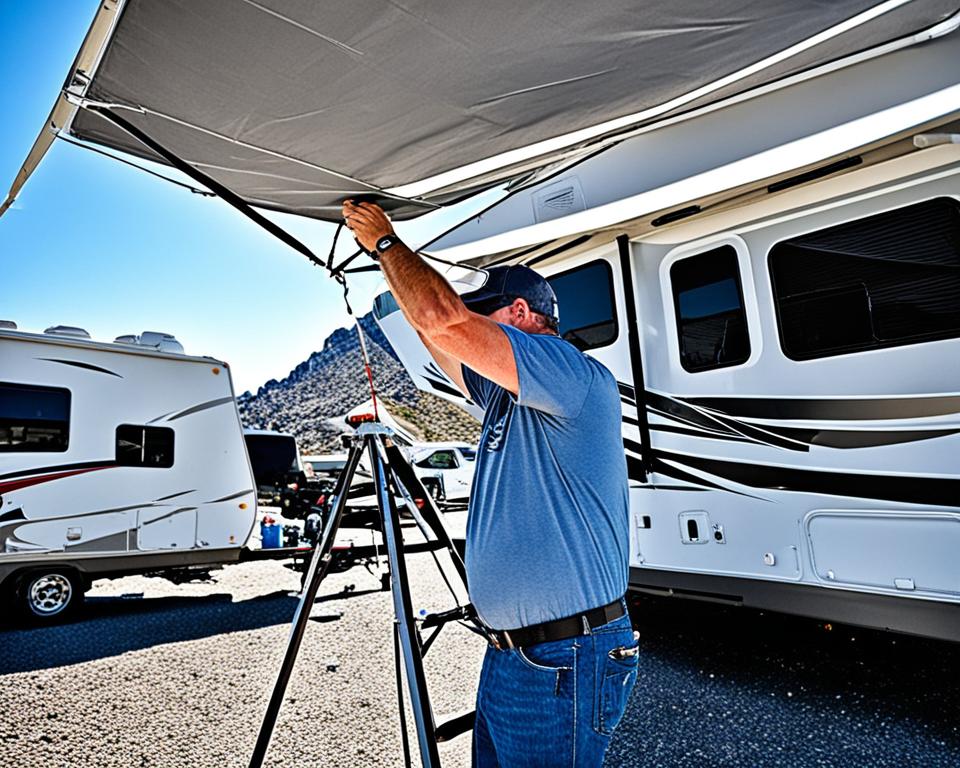
Putting Your Awning Back on the Camper
Once you have completed the necessary repairs to your RV awning, it’s time to put it back on your camper. Properly reinstalling the awning ensures that it is securely attached and aligned, ready to provide shade and protection for your outdoor adventures.
Reattaching the awning to your camper involves reversing the steps taken to remove it. Follow these simple steps to ensure a successful reinstallation:
- Step 1: Prepare the awning fabric by ensuring it is clean and free from any debris.
- Step 2: Position the awning arms at the appropriate height and angle, aligning them with the brackets on your camper.
- Step 3: Insert the awning arms into the brackets, making sure they are securely fastened.
- Step 4: Extend the awning fabric fully, being careful not to snag or damage it during the process.
- Step 5: Secure the awning legs to the ground or use the provided hardware to attach them to your camper, ensuring stability and preventing unwanted movement.
It’s essential to follow the manufacturer’s instructions specific to your RV awning model for the best results. Taking your time to do the job correctly will help avoid any potential issues later on.
Remember to double-check that all fasteners are tightened adequately to ensure a secure fit. Once everything is in place, step back and admire your awning, ready to provide you with shade and comfort on your next camping trip.
Finding the Right Repair Materials
When it comes to fixing tears in your RV awning, having the right repair materials on hand is essential. Choosing the appropriate products will ensure a successful repair job and help prolong the lifespan of your awning. Here are some recommended repair materials to consider:
Repair Tape
Repair tape is a versatile and easy-to-use product that can quickly mend small tears and holes in your RV awning. It provides a strong and durable seal, preventing further damage and water leakage. Look for repair tape specifically designed for awning repairs, as it is designed to withstand the outdoor elements.
Sewing Supplies
If you prefer a more traditional approach, using sewing supplies can be an effective way to repair tears in your awning. A heavy-duty needle and thread, along with a thimble, can help you stitch up small to moderate tears. Make sure to choose a thread that is suitable for outdoor use and can withstand UV exposure.
Cleaning Solutions
Prior to repairing your RV awning, it is important to clean the damaged area to ensure proper adhesion of the repair materials. Look for cleaning solutions specifically formulated for awnings, as they will effectively remove dirt, grime, and mildew without causing damage to the fabric. Follow the manufacturer’s instructions for best results.
Patching Materials
For larger tears or holes in your RV awning, patching materials are often necessary. These materials typically include fabric patches or adhesive-backed patches that can be applied to the damaged area for added reinforcement. Ensure that the patching material you choose matches your awning’s material type and color for a seamless repair.
If you’re unsure about which repair materials to use or if you’d like the convenience of having everything you need in one package, consider purchasing an awning repair kit. These kits often contain a combination of repair tape, sewing supplies, cleaning solutions, and patching materials, providing you with a comprehensive solution for your awning repair needs.
| Repair Material | Benefits |
|---|---|
| Repair Tape | Quick and easy application |
| Sewing Supplies | Traditional and durable repair method |
| Cleaning Solutions | Easily removes dirt, grime, and mildew |
| Patching Materials | Provides added reinforcement for larger tears or holes |
| Awning Repair Kit | Convenient and comprehensive solution |
By having the right repair materials on hand, you can confidently tackle the task of fixing tears in your RV awning. Whether you opt for repair tape, sewing supplies, cleaning solutions, patching materials, or an all-inclusive repair kit, choosing the appropriate products will ensure a successful repair and allow you to continue enjoying the shade and protection provided by your awning.
Seeking Professional Help
While many RV awning repairs can be done as DIY projects, there may be instances where it is advisable to seek professional help. If you are unsure about your repair abilities or if the damage is extensive, it may be best to consult a professional who specializes in RV awning repair. They will have the necessary expertise and tools to handle repairs efficiently.
When to Consult a Professional for Awning Tears
It’s important to know when to consult a professional for awning tears. If the tear is large or if there are multiple tears, it may require more extensive repairs that are best handled by a professional. Additionally, if you are unfamiliar with the repair process or lack the necessary tools and materials, it’s wise to rely on the expertise of a professional to ensure the repair is done correctly.
“If you are unsure about your repair abilities or if the damage is extensive, it may be best to consult a professional who specializes in RV awning repair.”
Professional RV awning repair services can provide the following benefits:
- Expertise: Professionals have years of experience and training in repairing RV awnings, ensuring that the job is done right.
- Efficiency: Professionals have access to specialized tools and materials, allowing them to complete repairs efficiently.
- Quality: Professionally repaired awnings are less likely to experience further damage or require additional repairs in the future.
When considering hiring a professional for awning repairs, it’s important to research and choose a reputable service provider. Look for companies that have positive customer reviews and offer warranties on their repair work. Additionally, consider getting multiple quotes to ensure you are getting a fair price for the repair services.
Remember, while DIY repairs can be cost-effective, there are instances where it’s best to rely on professional services for awning repair. Consulting a professional can save you time, money, and the potential frustration of attempting a repair beyond your expertise. So, don’t hesitate to reach out to a professional when needed.

Cost Considerations for Awning Repairs
When it comes to repairing RV awning tears, the cost can vary depending on several factors. It’s important to consider these factors and budget accordingly to ensure a successful repair without breaking the bank.
Factors Affecting the Cost of Awning Repair
Several key factors can influence the cost of repairing awning tears:
- The extent of the damage: The size and severity of the tear can impact the cost of repair materials and the time required for the repair process.
- The materials needed for repairs: The type of awning material and the necessary repair supplies can affect the overall cost.
- Professional services: If the damage is extensive or if you prefer to rely on the expertise of a professional, hiring a specialist can add to the repair costs.
- Replacement parts: In some cases, repairing the awning may require replacement parts, which can increase the overall cost.
Estimating Repair Costs for Awning Tears
While the exact cost of repairing awning tears can vary, it’s helpful to have a general idea of the potential expenses involved. Researching and comparing prices for repair materials and services can help you estimate the overall cost.
Affordable Awning Repair Options
If you’re on a tight budget, there are a few options to consider:
- DIY repairs: Taking on the repairs yourself can save money on labor costs. With the right tools and materials, you can tackle many awning tears as a DIY project.
- Discounted repair materials: Look for sales, discounts, or wholesale options for repair materials to help reduce costs.
- Reputable repair shops: Research and compare prices from reputable repair shops to find affordable options without sacrificing quality.
By carefully considering the factors that affect the cost of awning repair and exploring affordable options, you can effectively budget for RV awning repairs and keep your outdoor adventures on track.
Assessing the Long-Term Condition of Your Awning
While quick fixes can address immediate awning tears, it is essential to assess the long-term condition of your RV awning. Regular evaluations and inspections will help you make informed decisions about the best course of action for your awning’s maintenance and repair needs.
If your awning is showing signs of extensive wear, multiple tears, or structural damage, it may be more cost-effective and practical to consider investing in a new awning. Knowing when repairs are no longer sufficient is crucial in avoiding further damage and unnecessary expenses.
By evaluating the overall condition of your RV awning, you can plan for future awning maintenance and determine when it’s time to replace it. It is important to keep in mind that different awning materials have varying lifespans and durability, so understanding the specific needs of your awning is essential for its long-term performance.
Regularly inspect your awning for the following signs of wear and damage:
- Visible tears or holes
- Frayed or loose threads
- Stains, discoloration, or mold
- Structural instability or sagging
- Difficulty extending or retracting the awning
- Deterioration of the fabric or framework
Proper maintenance and care can extend the lifespan of your awning, but there may come a point when repairs are no longer a viable solution. Balancing the cost of repairs versus the cost of replacement is an important consideration.
“If the repairs will cost more than 50% of the price of a new awning, it is generally recommended to replace the awning instead of repairing it,” advises Richard Anderson, an RV repair specialist with over 10 years of experience. “This ensures that you have a reliable and sturdy awning that will last for years to come without recurring repair expenses.”
Planning for Future Awning Maintenance
Regular maintenance is key to keeping your RV awning in good condition and preventing major issues. By following a few simple steps, you can minimize the risk of tears and damage:
- Keep the awning clean: Regularly remove dirt, leaves, and other debris to prevent staining and potential damage
- Inspect for wear and tear: Regularly check for signs of damage, loose threads, or weakened areas
- Prevent water pooling: Adjust the pitch of the awning to prevent water accumulation, which can lead to stretching and mold growth
- Properly secure during inclement weather: During storms or high winds, retract the awning to prevent damage
By following these maintenance practices and conducting regular assessments of your awning’s condition, you can ensure its longevity and enjoy worry-free outdoor adventures.
| Repair | Pros | Cons |
|---|---|---|
| Quick fixes | – Affordable and time-efficient – Temporary solution to address immediate tears – DIY option for minor damage |
– May not provide long-term durability – Not suitable for extensive tears or structural damage – Limited lifespan of repaired area |
| Awning replacement | – Provides a fresh start with a new, sturdy awning – Long-term solution for extensive or irreparable damage – Allows for customization options |
– Higher upfront cost compared to repairs – Requires professional installation for seamless functionality |
Conclusion
In summary, taking care of your RV awning and fixing tears can be easily done with some DIY know-how. By following the proper repair steps and conducting regular maintenance, you can ensure the longevity of your awning and continue to enjoy the shade and protection it offers during your outdoor adventures.
Remember to assess the overall condition of your awning and address any small holes or tears promptly to prevent further damage. Conduct regular inspections, keep your awning clean, and remove debris regularly. Securing the awning during inclement weather is also crucial in preventing tears.
While it’s great to be able to tackle these repairs yourself, don’t hesitate to seek professional help if you’re unsure or if the damage is extensive. Safety should always be a top priority. By following these RV awning repair tips, you can save time and money and ensure that your awning lasts for years to come.
FAQ
What are the common causes of camper awning tears?
Camper awning tears can be caused by factors such as poor craftsmanship, loose threads, wear and tear, debris, and extreme weather conditions.
What types of damage can occur to RV awnings?
RV awnings can suffer from small holes, small tears, large holes, and large tears, each requiring specific repair techniques.
What are the steps to repair tears in an RV awning?
The typical repair steps include assessing the damage, removing the awning, repairing small holes and tears with tape, and addressing larger holes and tears with patching materials.
How can I maintain my RV awning to prevent tears?
Regular maintenance involves keeping the awning clean, removing debris, and inspecting for signs of damage or wear. Properly securing the awning during inclement weather is also crucial.
How do I put my awning back on the camper after repairing it?
Reinstalling the awning involves reversing the steps taken to remove it, ensuring a secure attachment and proper alignment according to the manufacturer’s instructions.
What materials do I need to repair tears in my RV awning?
Common repair materials include repair tape, sewing supplies, cleaning solutions, and patching materials. Consider using a complete awning repair kit for convenience.
When should I seek professional help for RV awning repairs?
If you are unsure about your repair abilities or if the damage is extensive, it may be best to consult a professional who specializes in RV awning repair.
How much does it cost to repair RV awning tears?
The cost varies depending on factors such as the extent of the damage and materials needed for repairs. Researching and comparing prices can help find affordable options.
How do I assess the long-term condition of my RV awning?
Regular inspections and evaluations can help determine if your awning shows signs of extensive wear, multiple tears, or structural damage that may require a new awning.
Can I fix tears in my RV awning on my own?
Many RV awning repairs can be done as DIY projects, but for complex or extensive damage, it is advisable to consult a professional.