Setting up a pop-up camper doesn’t have to be a daunting task. With some simple steps, you can have your camper ready for outdoor adventures in no time. Whether you’re a seasoned camper or a first-timer, these easy instructions will guide you through the process effortlessly.
Pop-up campers are a popular choice for outdoor enthusiasts looking for a convenient and comfortable camping experience. They offer the perfect balance between the freedom of tent camping and the amenities of an RV. With their lightweight design and compact size, pop-up campers are easy to tow and maneuver, making them a great choice for any outdoor adventure.
Key Takeaways:
- Setting up a pop-up camper is quick and easy, allowing you to spend more time enjoying the outdoors.
- Pop-up campers offer a convenient and comfortable camping experience, with the amenities of an RV.
- Their lightweight design and compact size make pop-up campers easy to tow and maneuver.
- Follow the step-by-step instructions for a hassle-free setup process.
- Enjoy the freedom and versatility of pop-up camping with a well-prepared and properly maintained camper.
Choosing the Right Campsite
When planning a camping trip with your pop-up camper, selecting the perfect campsite can greatly enhance your outdoor experience. Consider the following factors to ensure a relaxing and enjoyable stay:
Location and Level Ground
Look for a campsite that is nestled in a picturesque location, such as near a lake, mountain, or forest. It’s important to find a site with level ground to ensure stability and ease during the setup process. Camping on an uneven surface can make it challenging to stabilize your pop-up camper, affecting your overall comfort.
Proximity to Trees
While being surrounded by nature’s beauty is one of the joys of camping, it’s essential to consider the proximity of trees to your campsite. Ensure that there is sufficient space around the campsite to prevent any accidental collisions with tree branches or trunks, which could damage the roof or beds of your pop-up camper.
Accessibility to Electrical Hookup
Many pop-up campers are equipped with electrical systems to power various appliances and amenities. If you require electricity during your camping trip, look for a campsite that offers an electrical hookup. This will allow you to conveniently connect your pop-up camper to a power source, ensuring a comfortable and convenient experience.
Location of Fire Pit
For those who enjoy campfires and outdoor cooking, consider the location of the fire pit within the campsite. A campsite with a fire pit in close proximity to your pop-up camper allows for easy access and creates a cozy ambiance for gathering around the fire with family and friends.
By taking these factors into account when selecting a campsite, you can ensure a pleasant and stress-free camping experience with your pop-up camper.
| Factors to Consider | Importance |
|---|---|
| Location and level ground | High |
| Proximity to trees | Medium |
| Accessibility to electrical hookup | High |
| Location of fire pit | Medium |
Choosing the right campsite for your pop-up camper is crucial for a comfortable and enjoyable outdoor adventure. Consider factors such as the location, level ground, proximity to trees, accessibility to an electrical hookup, and location of the fire pit to create lasting memories in the great outdoors.
Leveling the Camper
To ensure stability and comfort during your camping trip, proper leveling of your pop-up camper is crucial. Uneven ground can lead to an uncomfortable sleeping experience and potential damage to the camper. Here’s a step-by-step guide on how to level your camper for a more enjoyable camping experience.
Materials Needed:
- Plywood or commercial leveling blocks
Step 1: Assess the Level
Before starting the leveling process, park your camper on a level surface if possible. This will give you a better starting point for adjustments.
Step 2: Choose the Leveling Method
There are two common methods for leveling a camper: using plywood or commercial leveling blocks. Both options are effective, so choose the one that suits your preference and availability.
Tip: Commercial leveling blocks are designed specifically for leveling campers and are more convenient as they can be stacked and adjusted easily.
Step 3: Level Side to Side
- Place the leveling blocks or plywood near the tires on the low side of the camper.
- Carefully drive or back the camper onto the blocks until it is level from side to side.
Step 4: Check the Level
Use a bubble level placed on the floor inside the camper to ensure it is level from side to side. Make any necessary adjustments by adding or removing blocks or plywood until the camper is perfectly level.
Tip: It’s essential to level the camper from side to side before moving on to leveling it front to back.
Step 5: Level Front to Back
- Use the tongue jack to adjust the front-to-back level of the camper.
- Extend or retract the tongue jack until the camper is level.
- Check the level of the camper using the bubble level placed on the floor inside.
Step 6: Fine-Tune the Leveling
After leveling the camper from front to back, recheck the side-to-side level and make any necessary adjustments using the leveling blocks.
Step 7: Test the Stability
Once you have leveled the camper, test its stability by walking inside and ensuring there are no noticeable slopes or tilts. This will help guarantee a comfortable experience during your camping trip.
Summary
Leveling your pop-up camper is an important step in ensuring a comfortable and enjoyable camping experience. Using plywood or commercial leveling blocks, you can easily achieve a stable and level camper. Start by leveling from side to side, then adjust the front-to-back level. Always double-check the level using a bubble level and test the stability before settling in for your outdoor adventure.
Setting Up the Tongue Jack
After leveling the camper, it’s time to unhook the tow vehicle and prepare for a safe and successful camping experience. Follow these steps to set up the tongue jack:
- Disconnect the electrical connection between the tow vehicle and the camper. This ensures that the camper’s lights and signals won’t drain the tow vehicle’s battery during your trip.
- Detach the safety chains that connect the tow vehicle to the camper. These chains act as a backup in case the hitch fails, providing an added layer of security while towing.
- Lower the tongue jack by releasing the retaining pin and swinging it down. The tongue jack serves as a support for the front of the camper, allowing you to easily manipulate its position.
- Once the tongue jack is lowered, ensure that the camper is fully separated from the tow hitch ball. This step is crucial before moving the tow vehicle away, preventing any potential accidents or damage.
Setting up the tongue jack may seem like a small step, but it plays a vital role in the overall stability and safety of your camping setup. By following these simple guidelines, you’re taking the necessary precautions to ensure a smooth and enjoyable camping experience.
Connecting to Electricity and Water
Once you have set up your pop-up camper and chosen the perfect campsite, it’s time to connect to essential utilities like electricity and water. These connections will ensure a comfortable and convenient camping experience. Follow these steps to easily connect your pop-up camper:
Connecting to Electricity
To power your pop-up camper and its appliances, you’ll need to connect to an electrical hookup at the campground. Here’s how:
- Locate the electrical hookup pedestal at your campsite.
- Unroll the electrical cord provided with your camper and untangle any knots or kinks.
- Plug one end of the cord into the electrical hookup at the pedestal.
- Connect the other end of the cord to the electrical inlet on your pop-up camper.
- Ensure the connection is secure.
- Locate the breaker box in your camper.
- Switch on the breaker corresponding to the electrical hookup.
That’s it! You’ve successfully connected your pop-up camper to the campground’s electrical hookup. Now, you can enjoy the convenience of electricity for your camper’s appliances.
Powering the Camper Fridge
With the electrical hookup established, you can now power up your camper fridge to keep your food and beverages cool during your camping trip. Here’s how:
- Locate the control panel for your camper’s fridge.
- Switch on the power to the fridge.
- Adjust the temperature settings according to your preference.
Setting Up the Outdoor Rug
An outdoor rug adds comfort and aesthetics to your campsite. Here’s how to set it up:
- Choose a suitable location for your rug near the entrance of your pop-up camper.
- Unroll the outdoor rug and position it on level ground.
- Smooth out any wrinkles or folds in the rug.
Connecting to Water Supply
Access to water is essential for cooking, cleaning, and personal hygiene while camping. Follow these steps to connect your pop-up camper to a water supply:
- Locate the water hookup or spigot near your campsite.
- Attach one end of a water hose to the spigot.
- If your pop-up camper has a built-in water tank, connect the other end of the hose to the camper’s water inlet. If not, skip to the next step.
- If your pop-up camper doesn’t have a built-in water tank, place the free end of the hose into a water container, such as a jug or bucket.
- Turn on the water supply.
Connecting a Drain Hose
Proper drainage is important for your pop-up camper’s sink. Here’s how to connect a drain hose:
- Ensure the drain hose provided with your camper is long enough to reach the designated drainage area.
- Attach one end of the drain hose to the sink’s drain outlet.
- Position the other end of the hose in a suitable drainage area.
Now you’re all set! You have successfully connected your pop-up camper to electricity and water, allowing you to enjoy a comfortable and convenient camping experience. Remember to follow campground guidelines for electrical and water usage to ensure a safe and enjoyable stay.
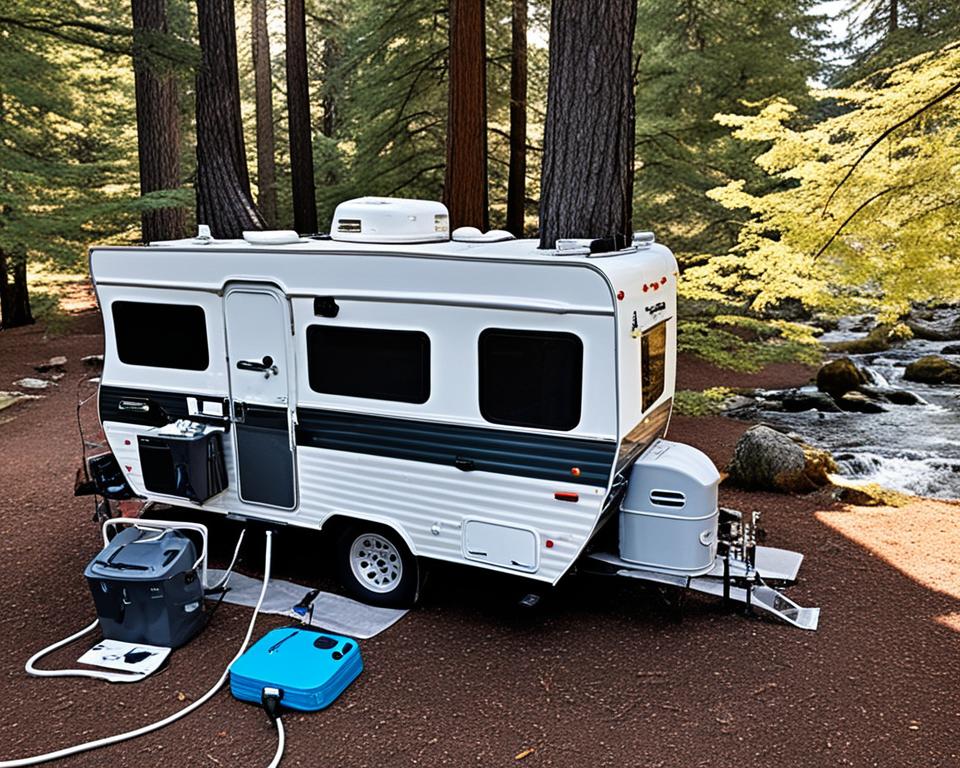
Raising the Roof and Extending Beds
Now that you have leveled your pop-up camper and set up essential connections, it’s time to raise the roof and extend the beds for a comfortable camping experience. Follow these step-by-step instructions to complete this crucial step:
- Begin by unlatching the roof using the designated roof latches. These latches ensure that the roof remains securely in place once raised.
- Locate the handle for cranking up the roof. Rotate the handle in the appropriate direction, usually clockwise, to raise the roof to its full height. This step requires moderate physical effort, so take your time and apply steady pressure.
- Once the roof is fully raised, lock it in position using the roof latches. These latches provide additional stability and prevent the roof from accidentally closing while you are inside.
- To extend the beds, start by pulling them out from their compact position. Use smooth, steady motions to ensure a safe and controlled extension.
- Install the bed support braces to keep the beds stable. These braces are provided specifically for this purpose and can be easily attached to the bed frames.
- If your pop-up camper features a slideout, release the latch and carefully pull it out to create additional living space.
- Attach the canvas to the beds by securing it with bungee cords. This step ensures privacy and protection from the elements.
- To complete the setup, lower the door into position and secure it with locking clips. This ensures easy access in and out of the camper.
With the roof raised, beds extended, and canvas attached, your pop-up camper is now ready to provide a comfortable and welcoming environment for your outdoor adventures.
| Step | Description |
|---|---|
| 1 | Unlatch the roof using the designated roof latches. |
| 2 | Rotate the handle in the appropriate direction to raise the roof to its full height. |
| 3 | Lock the roof in position using the roof latches. |
| 4 | Pull out the beds from their compact position. |
| 5 | Attach the bed support braces to keep the beds stable. |
| 6 | If applicable, release the latch and pull out the slideout. |
| 7 | Secure the canvas to the beds using bungee cords. |
| 8 | Lower the door into position and secure it with locking clips. |
Image:
Setting Up the Galley and Outdoor Stove
Once the pop-up camper is leveled and the roof is raised, it’s time to set up the galley and outdoor stove. This section of the camper is where you can prepare delicious meals and enjoy outdoor cooking experiences.
To begin, lower the galley into position, ensuring it is securely locked in place. The galley provides a convenient countertop space and storage compartments for your cooking essentials.
Next, it’s time to connect and set up the outdoor stove. Locate the propane fitting on the camper and attach the outdoor stove securely. Propane-powered stoves offer efficient cooking options and are perfect for outdoor adventures.
If you plan to cook using the outdoor stove, make sure you have a propane tank ready for use. Connect the propane tank to the stove following the manufacturer’s instructions, and ensure the gas valves are properly closed when not in use.
Additionally, it’s important to have a water hookup for cleaning dishes and other kitchen tasks. Depending on the campground’s facilities, you can either hook up the camper’s water hose to the campground’s water source or use the camper’s built-in water tank.
Lastly, don’t forget to connect a drain hose for the sink in the galley. This will ensure that any wastewater from cleaning and cooking can be properly drained.
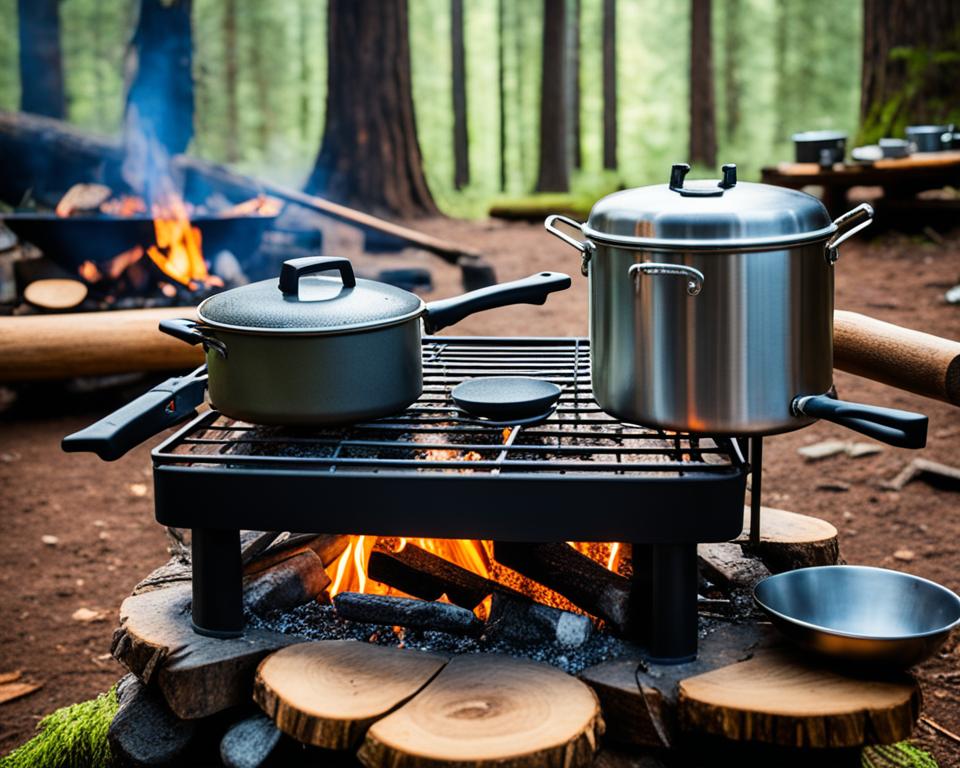
With the galley set up and the outdoor stove connected, you’re now ready to unleash your culinary skills and enjoy delicious meals in the great outdoors.
Starting the Hot Water Tank
To enjoy hot water during your camping trip, it’s essential to start the hot water tank in your pop-up camper. Follow these simple steps to ensure a steady supply of warm water for your needs.
- Access the hot water tank: Locate the hot water tank in your pop-up camper. It is typically situated in the kitchen area or a designated compartment.
- Turn the gas knob to the pilot position: Locate the gas knob on the hot water tank and rotate it to the pilot position. This setting prepares the tank for ignition.
- Light the pilot: Use a long lighter to ignite the pilot flame. Carefully hold the flame near the pilot burner and press the ignite button, if available. Continue to hold the knob in the pilot position while lighting the flame.
- Wait for the pilot flame to stay lit: After lighting the pilot flame, keep holding the gas knob in the pilot position for about one minute. This allows the thermocouple to warm up and stabilize the flame. Monitor the flame and ensure it stays lit.
- Turn the gas knob to the on position: Once the pilot flame is consistently burning, gently release the gas knob and rotate it to the on position. This activates the hot water tank and allows it to heat the water.
By following these steps, you can ensure that your pop-up camper’s hot water tank is properly started and ready to provide hot water for your camping needs.
| Step | Description |
|---|---|
| 1 | Access the hot water tank |
| 2 | Turn the gas knob to the pilot position |
| 3 | Light the pilot |
| 4 | Wait for the pilot flame to stay lit |
| 5 | Turn the gas knob to the on position |
Benefits of Pop-Up Campers
Pop-up campers offer a multitude of advantages that make them a popular choice for outdoor enthusiasts. Whether you’re a seasoned camper or a beginner, these campers provide the perfect balance of comfort, convenience, and versatility for your camping adventures.
Increased Comfort
One of the key advantages of pop-up campers is the level of comfort they offer. With their spacious interiors and thoughtful design, these campers provide a comfortable and cozy space for you and your family to relax and unwind after a day of outdoor activities. You can enjoy the convenience of proper beds, seating areas, and amenities that enhance your camping experience.
Easy Setup
Setting up a pop-up camper is a breeze, making it an ideal choice for those who appreciate simplicity and efficiency. These campers can be quickly and easily deployed, allowing you to spend more time enjoying nature and less time dealing with complicated setup processes. With just a few simple steps, you can transform your camper from a compact towing package to a spacious and comfortable living space.
Lightweight Design
Pop-up campers are known for their lightweight design, making them easy to tow and maneuver. Unlike larger RVs or motorhomes, which can be bulky and cumbersome, pop-up campers are lighter and more agile. This makes them a great option for those who prefer to travel with smaller vehicles or are looking for a camper that can easily navigate through challenging terrains.
Spaciousness
Despite their compact size when folded, pop-up campers provide ample living space when fully expanded. These campers often come equipped with slide-outs, which allow for the expansion of the interior space, creating more room for sleeping, dining, and relaxing. The clever design maximizes the available space, ensuring you have all the comfort and functionality you need during your camping trip.
Affordability
When compared to larger RVs or motorhomes, pop-up campers are generally more affordable, making them an attractive option for budget-conscious campers. These campers offer an excellent combination of features and value at a lower price point, allowing you to enjoy the camping experience without breaking the bank. Moreover, their lower weight can also lead to savings in fuel costs when towing.
Adaptability to Various Camping Environments
Pop-up campers are highly versatile, allowing you to explore a wide range of camping environments. From established campgrounds with full hookups to more remote and off-grid locations, these campers can adapt to different settings and situations. Whether you prefer camping in the wilderness or enjoying the amenities of a developed campground, a pop-up camper provides the flexibility to meet your specific camping needs.
If you’re looking for a camping experience that combines comfort, convenience, and versatility, a pop-up camper is an excellent choice. With their numerous advantages, these campers allow you to enjoy the great outdoors with all the comforts of home.
Stay tuned for the next section where we’ll explore essential maintenance tips to keep your pop-up camper in optimal condition for many years of camping enjoyment.
Maintenance Tips for Pop-Up Campers
Regular maintenance is vital to ensure that your pop-up camper remains in optimal condition, allowing you to enjoy years of camping adventures. By following these maintenance tips, you can keep your camper clean, well-lubricated, and in excellent working order. Implementing these practices will contribute to a long-lasting and enjoyable camping experience.
Cleaning
Proper cleaning is crucial for the overall maintenance of your pop-up camper. Regularly remove dirt, debris, and stains from both the interior and exterior surfaces. Use mild soap and water to clean the exterior of the camper, ensuring you pay attention to the roof, sidewalls, and windows. Inside the camper, wipe down all surfaces, including countertops, seats, and floors, using appropriate cleaning products. A clean camper not only looks great but also helps prevent the accumulation of mold, mildew, and unpleasant odors.
Lubrication
Keeping your pop-up camper’s moving parts well-lubricated is essential for smooth operation and longevity. Apply lubricant to hinges, tracks, and any other moving components, such as the crank system for raising and lowering the roof. This ensures that everything moves freely without sticking or causing unnecessary strain on the mechanisms. Regular lubrication also helps prevent rust and corrosion, particularly for outdoor components that may be exposed to the elements.
Tire Pressure
Maintaining proper tire pressure is critical for the safety and performance of your pop-up camper. Check the tire pressure regularly, especially before embarking on a trip. Underinflated tires can lead to decreased fuel efficiency and increased tire wear, while overinflated tires can compromise stability and cause blowouts. Refer to the manufacturer’s specifications for the recommended tire pressure and use a reliable tire pressure gauge to ensure accuracy.
Addressing Issues Promptly
Addressing any issues or damage promptly is essential for preventing further damage and ensuring that your pop-up camper remains in top condition. If you notice any leaks, cracks, or malfunctioning components, take immediate action to repair or replace them. This proactive approach can help minimize potential problems and costly repairs down the line.
“Regular maintenance is the key to preserving the integrity and functionality of your pop-up camper. By investing time and effort into cleaning, lubrication, tire pressure checks, and timely repairs, you can enjoy endless adventures with peace of mind.”
By following these maintenance tips for your pop-up camper, you can ensure that it remains in excellent condition, providing you and your loved ones with countless memorable camping experiences.
Example Maintenance Schedule
Stay on top of your pop-up camper maintenance by creating a schedule to help you remember important tasks. Adapt this example maintenance schedule to fit your needs:
| Task | Frequency |
|---|---|
| Cleaning Interior | After each camping trip |
| Cleaning Exterior | Monthly |
| Lubricating Moving Parts | Every 3 months |
| Tire Pressure Check | Before each trip |
| Addressing Issues | As soon as they arise |
Developing a maintenance routine and adhering to it will help keep your pop-up camper in optimal condition, ensuring many years of enjoyable camping adventures.
Being proactive about maintenance ensures that every camping trip is smooth, worry-free, and full of unforgettable moments. So take the time to clean, lubricate, check tire pressure, and address any issues promptly. Your pop-up camper will be ready to hit the road whenever you are!
Storing Your Pop-Up Camper
Properly storing your pop-up camper is essential for ensuring its longevity and keeping it in top condition for future adventures. By following a few simple steps, you can protect your investment and be ready to hit the road again when the camping season returns.
1. Empty and Clean the Camper
Before storing your pop-up camper, take the time to remove all belongings and thoroughly clean both the interior and exterior. Clear out any food, trash, or personal items to prevent attracting pests and minimize the risk of mold or mildew. Give the camper a good scrub, paying attention to all surfaces, including kitchenette areas, beds, and floors. Use mild soap, water, and non-abrasive cleaning supplies that won’t damage the camper’s finishes.
2. Fold It Up
Once the camper is clean and free of any loose items, carefully fold it up according to the manufacturer’s instructions. Begin by collapsing the roof and lowering any slideouts, if applicable. Secure all latches and locks to keep the camper in place during storage. Folding your camper correctly will not only save space but also prevent any unnecessary wear and tear on components.
3. Cover It Up
To protect your pop-up camper from dust, debris, and UV rays, it’s recommended to cover it with a durable tarp or camper cover. Choose a cover that is specifically designed for your camper’s size and shape. Ensure the tarp or cover is securely fastened to prevent any wind damage.
4. Find a Dry Area
When selecting a storage location for your pop-up camper, opt for a dry area that offers protection from rain, snow, and excessive moisture. A garage, carport, or covered storage facility are ideal options. If these options aren’t available, consider using a climate-controlled storage unit or investing in an all-weather protection cover.
5. Regularly Check and Maintain
While in storage, it’s important to periodically check on your pop-up camper and perform basic maintenance tasks. This includes inspecting the cover for any signs of damage or wear, ensuring all latches and locks are secure, and checking tire pressure. Take the time to lubricate moving parts, such as hinges and slides, to prevent rust and keep them functioning smoothly.
By following these storage tips, you can extend the lifespan of your pop-up camper and ensure it’s ready for many more outdoor adventures to come.
Image provided above displays a neatly folded pop-up camper, covered to protect it from the elements.
Conclusion
Setting up and maintaining a pop-up camper can be a straightforward process, allowing you to enjoy the convenience and comfort of outdoor adventures. With proper care and storage, your pop-up camper can provide endless opportunities for memorable camping trips.
By following the step-by-step instructions for setting up your pop-up camper, you can easily prepare your home away from home in no time. Choosing the right campsite, leveling the camper, and setting up the tongue jack are essential steps to ensure stability and safety. Connecting to electricity and water, raising the roof and extending beds, and setting up the galley and outdoor stove add comfort and functionality to your camping experience.
Maintaining your pop-up camper is important to ensure its longevity. Regular cleaning, lubrication of moving parts, and checking tire pressure are simple yet effective maintenance tips. Additionally, proper storage in a dry and shaded area, along with covering your camper, will protect it from the elements and extend its lifespan.
With a well-maintained pop-up camper, you can embark on countless camping trips, enjoying the great outdoors with convenience and comfort. So, start your adventure today and create memories that will last a lifetime!
FAQ
How long does it take to set up a pop-up camper?
Setting up a pop-up camper can be quick and easy, typically taking around 15-30 minutes.
What should I consider when choosing a campsite for my pop-up camper?
When selecting a campsite, consider factors such as level ground, proximity to trees, the location of the fire pit, and the accessibility of an electrical hookup if needed.
How do I level my pop-up camper?
To level your pop-up camper, use plywood or commercial leveling blocks to adjust for any unevenness in the ground. Check the camper’s level from side to side and make necessary adjustments.
How do I set up the tongue jack?
To set up the tongue jack, unhook the tow vehicle by disconnecting the electrical connection and safety chains. Lower the tongue jack by releasing the retaining pin and swinging it down. Ensure the camper is fully separated from the tow hitch ball before moving the tow vehicle away.
How do I connect my pop-up camper to electricity and water?
Connect your pop-up camper to the campground’s electrical hookup by plugging in the cord and switching on the breaker. Turn on the power to the camper fridge and set up your outdoor rug. Connect the water hose to a spigot or use the camper’s water tank, and connect a drain hose for the sink.
How do I raise the roof and extend the beds of my pop-up camper?
Unlatch the roof and crank it up using the handle, securing it with the roof latches. Extend the beds by pulling them out and installing the bed support braces. If your camper has a slideout, release the latch and pull it out. Attach the canvas to the beds and secure it with bungee cords. Lower the door into position and secure it with locking clips.
How do I set up the galley and outdoor stove?
Lower the galley into position and set up the outdoor stove by connecting it to the camper’s propane fitting. Hook up the water hose or use the water tank, and connect a drain hose for the sink.
How do I start the hot water tank in my pop-up camper?
Access the hot water tank and turn the gas knob to the pilot position. Light the pilot using a long lighter and wait until it stays lit. Turn the knob to the on position to activate the hot water tank.
What are the benefits of pop-up campers?
Pop-up campers offer advantages such as increased comfort, easy setup, lightweight design, spaciousness, affordability, and adaptability to various camping environments.
What maintenance tips should I follow for my pop-up camper?
Regular maintenance is important to keep your pop-up camper in optimal condition. Clean the camper regularly, lubricate moving parts, check tire pressure, and address any issues promptly to ensure a long-lasting and enjoyable camping experience.
How should I store my pop-up camper?
Properly storing your pop-up camper is essential for its longevity. Empty and clean the camper, fold it up, and cover it with a tarp. Store it in a dry, shaded area to protect it from the elements.

